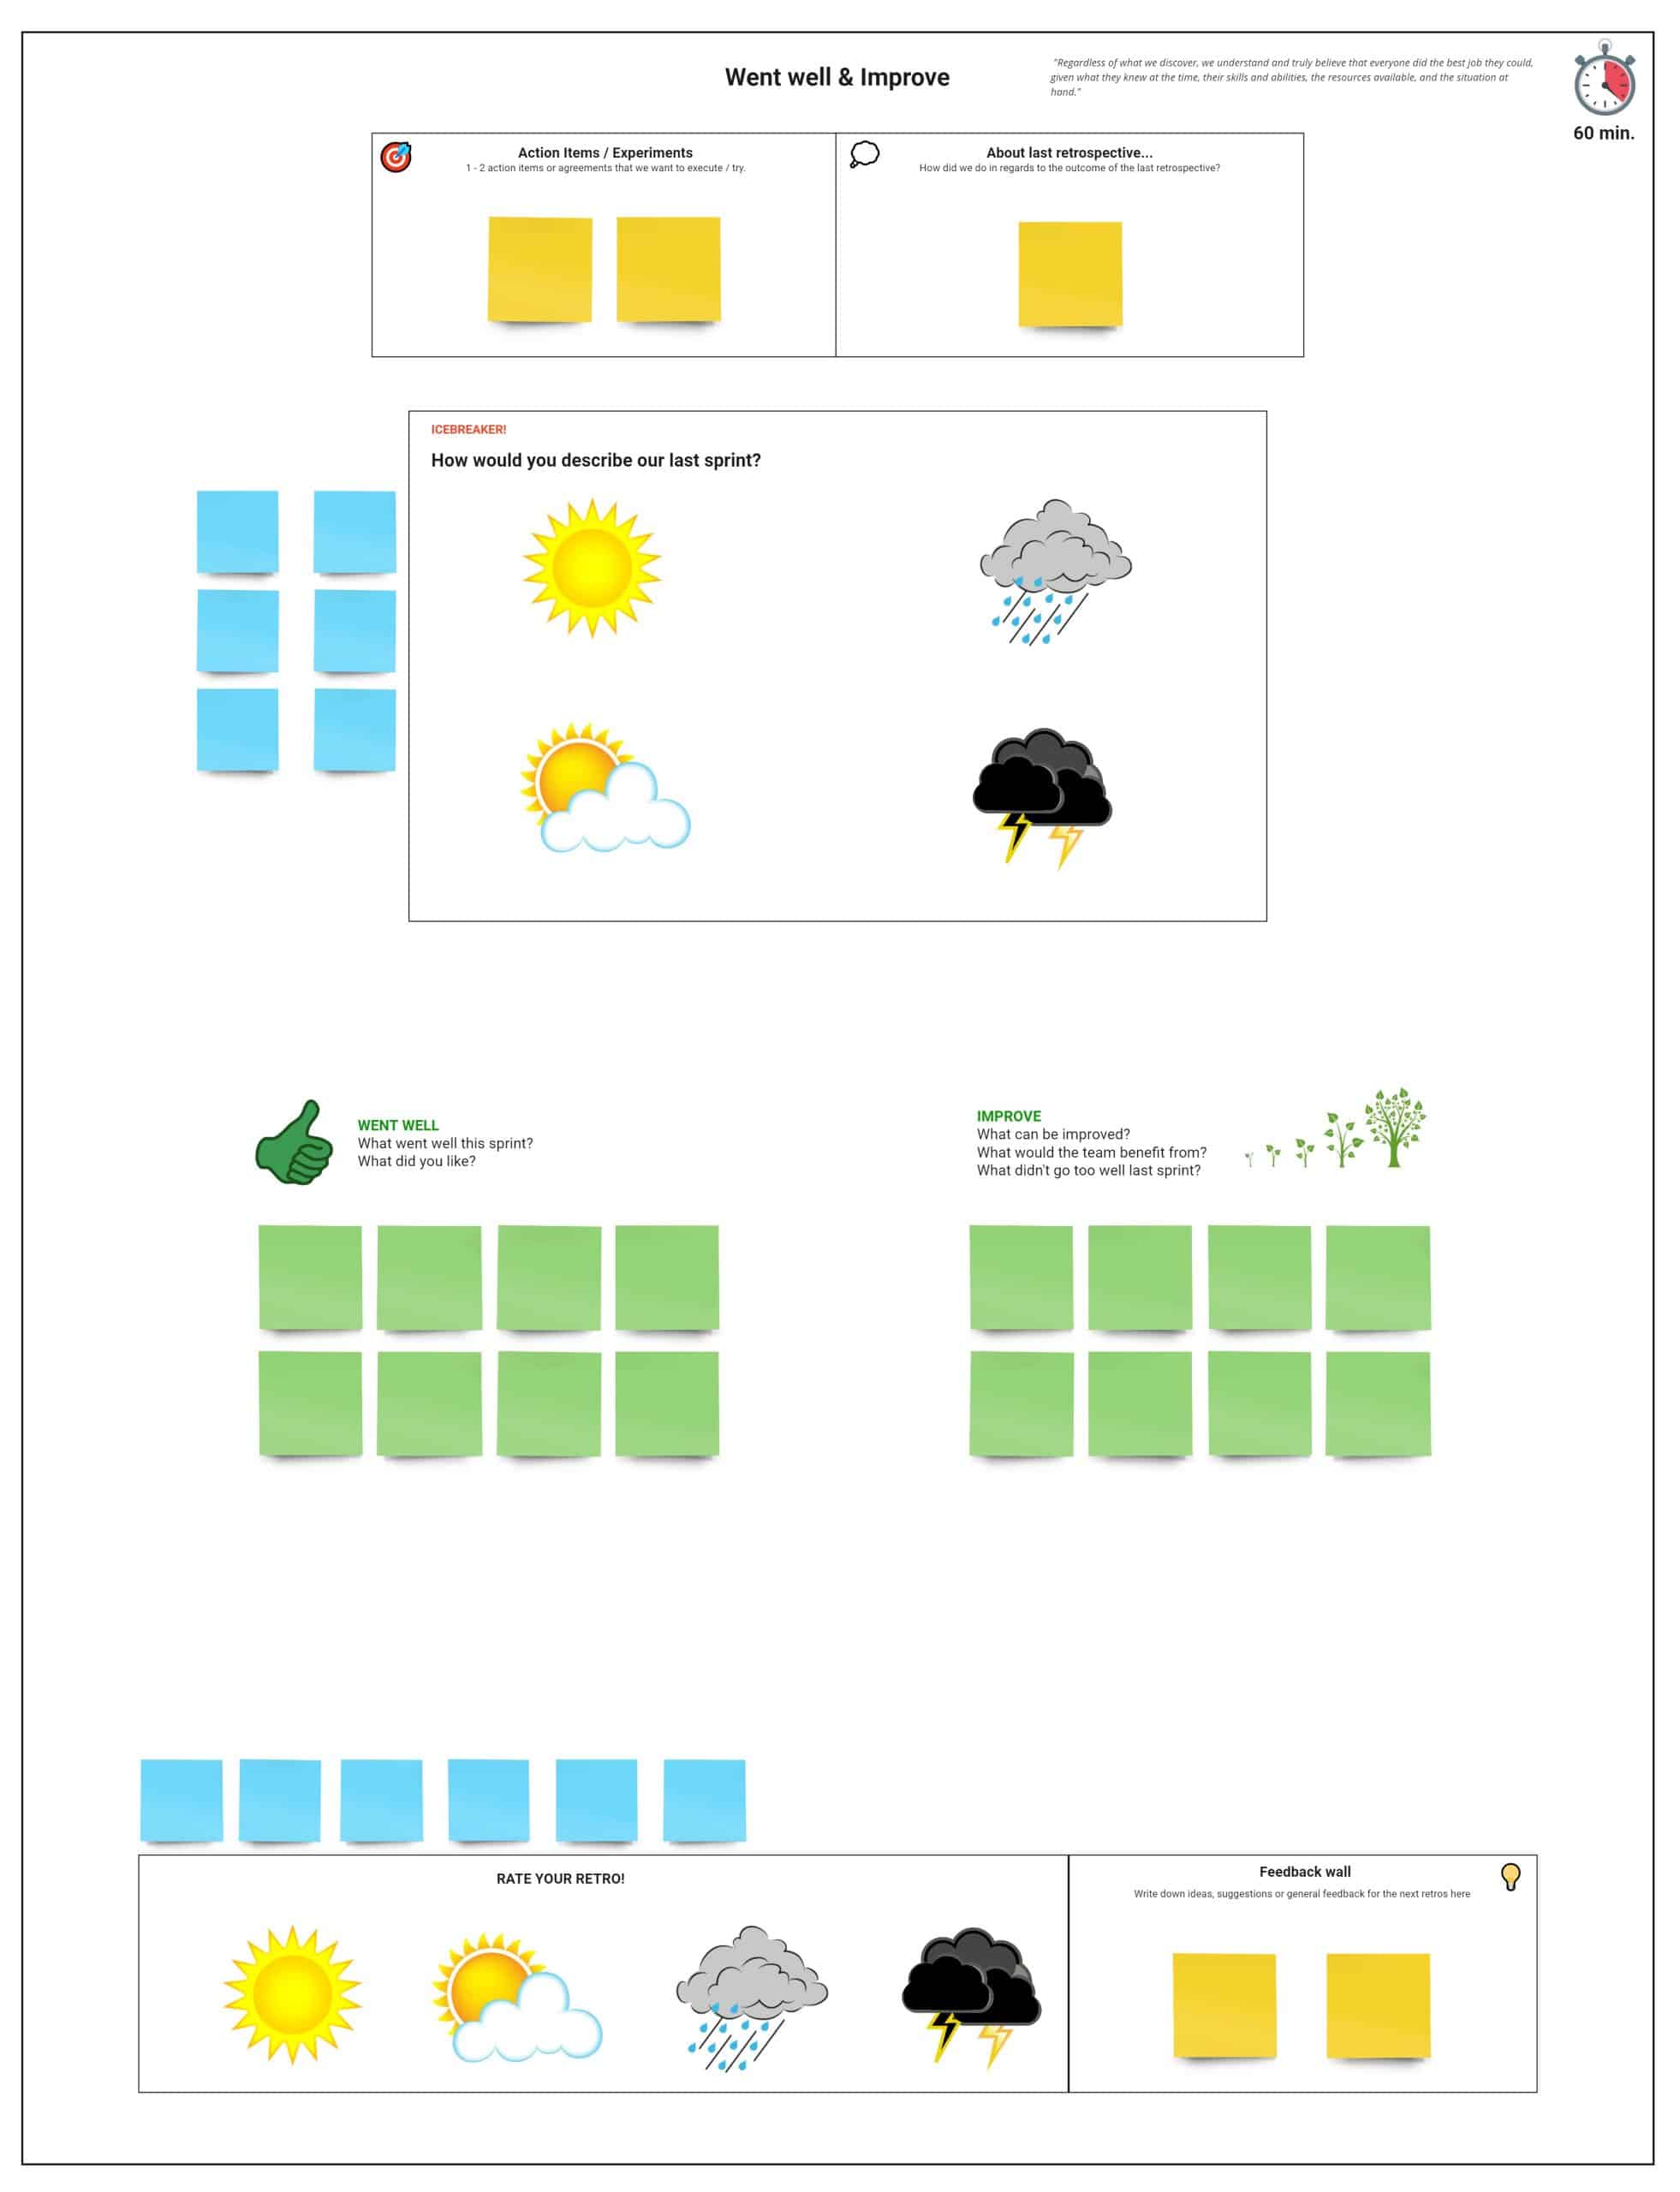
Went well & Improve
The went well & improve is a basic, easy and lightweight retro format that can be used in any sprint, project or release retrospective. It enables the team to think about what went well in the previous iteration and what can be improved in the next one.
The Icebreaker
The icebreaker that we use in this template is the weather forecast. Ask every participant to indicate how they would “rate” the last sprint:
- Sun: it was an amazing iteration, everything went well and we liked it a lot.
- Clouds: it was an overall good iteration with some challenges but no big struggles.
- Rain: it was a difficult sprint with quite some challenges. It wasn’t the best sprint we experienced.
- Thunder: it was a bad sprint. We only had struggles and we have a lot to improve.
You can ask everybody to share a few words that explain why they chose that specific forecast. Don’t go into any detailed discussions in this stage, as the goal is just to get everybody engaged and actively participating.
The retrospective format
The retrospective consists of 2 stages:
- “Went well:” what went well last iteration? What did you like?
- “Improve:” what can be improved? What would the team benefit from? What didn’t go too well last iteration?
After explaining the 2 stages to your team, give everybody a few minutes to write down their thoughts on a post-it. After this, you can do a quick dot voting session to determine the most important one(s) and start with a discussion on those.
While having the discussion on a topic, always focus on what’s within the control of the team. Don’t focus too much on external people or factors, but mainly on the things that are within the control of the team to identify improvement actions that the team is able to take. You want to have 1 – 2 action items at the end of the retrospective that you can implement in the next iteration(s). Remember: you will not always have big live changing action items in each retrospective. That’s also not the intention. A small action that brings a small improvements is already very good. Try to improve a little each sprint instead of trying to bring big changes at once.
About last retrospective...
A crucial part of the retrospective is to reflect on the outcome of the previous one! Teams often forget to do this, but it is very important as it gives the team the confirmation that the action items are actually important… And that we want to make sure we improve! There is a section on the top of the template where you can refer to the action items of the last retrospective. Go over them, see how you are doing in regards to them, and decide what to do next.
Rate your retro!
At the very end of the retrospective, I ask the team to quickly rate their retrospective with focus on:
- Did we have a good discussion? Did we speak openly, and respect each others opinion?
- Do we have valuable action items? And, are we confident that we will do them in the next sprint?
We also use a feedback wall where team members can share their feedback on the retrospective. As the facilitator, you can encorporate this feedback into the next retrospective session.
Other things about the format
On the very top of the format, you can see 2 elements:
- Action items / experiments: this is the place where you would write down the action items during the retrospective. This makes it easy to summarize them at the end of the session.
- Idea for the next retrospective: I always like to foresee an area where people can give feedback or give input for the next retrospective. This can be feedback on the current format, ideas for a new format, tips, general feedback… Anything that can help us make the next retrospective even better! I would not make it required for people to give input in this, make them feel free to give input when they come up with something.
Download the template (for free)
You can download the Miro template for free below:
If you don’t have a premium version of Miro, you can also download the picture at the top of the screen and create the board in Google Drawings.


Recent Comments